Pansy Painting Tutorial

Our First Tutorial~Summer Pansies
Supplies Needed:
Plastic Table cloth to protect area working
Large #10 flat paint brush (This is a beginner set of brushes, or just purchase with a kit below)
Plastic cup filled 1/3 with water
White, Purple and Yellow Acrylic Paints (for background)This is a set that also includes paint brushes.
Paper Plate
White, Dark Purple, Light Purple and Yellow Fluid Pour Paints
Small cups, or you could also use another paper plate for pour paints.
Paper Towels
(I've linked most supplies to make easy shopping for you-I do get a small commission if you choose to use the links.)
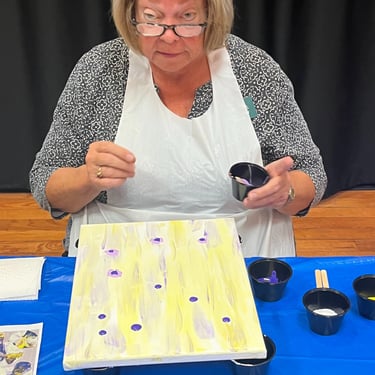
The Set Up
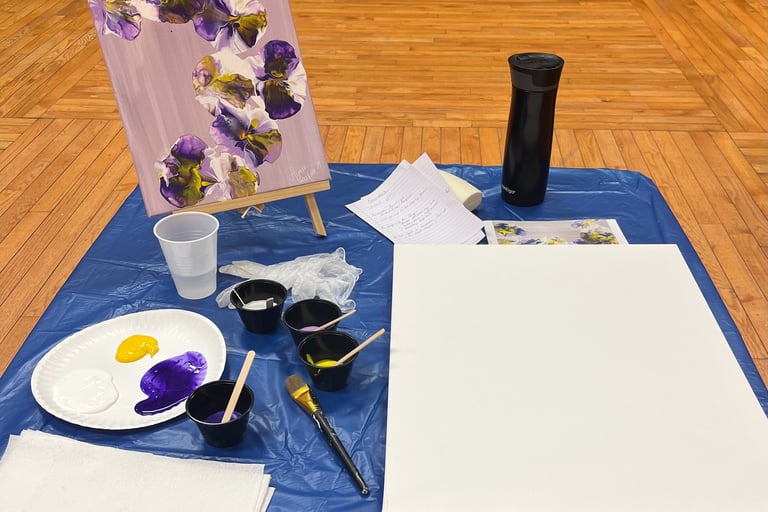
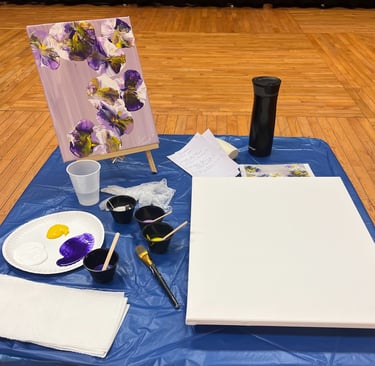
Set up your workspace having all your supplies ready to begin your painting process. The above picture shows everything we'll use for this painting. Not seen are what I used to raise the canvas off the work surface.
Step One:
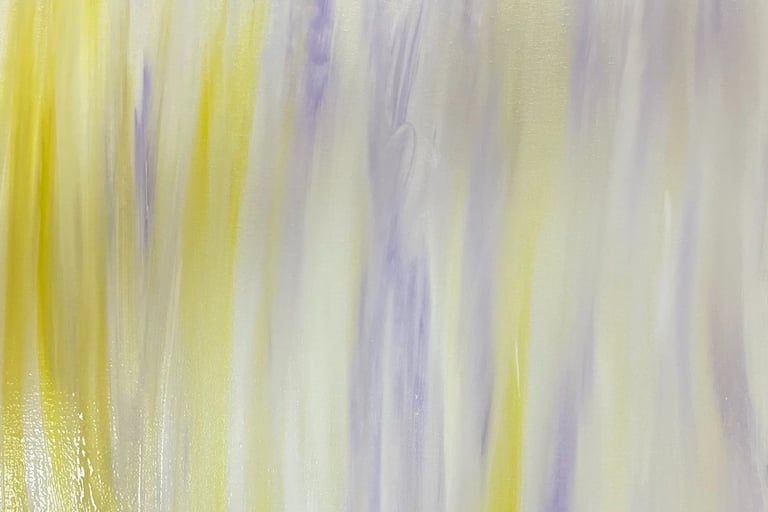
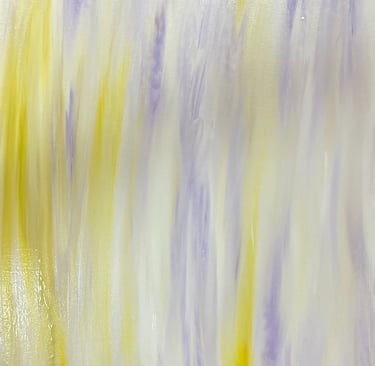
We're going to use the flat brush, water and the paints on the paper plate. Start off by painting your white paint on the canvas. These will be loose big strokes, all going in the same direction. Make sure to dip your brush in that glass of water periodically to make it easier for the paint to flow on the canvas and keep the paint thin. Once, you've covered the canvas (doesn't have to be completely) with the white, begin laying in strokes of purple then white. See the picture below.
Tip: These are big brush strokes, we are not looking to have the paint blended. Also, don't forget the sides, top and bottom.
Step Two:
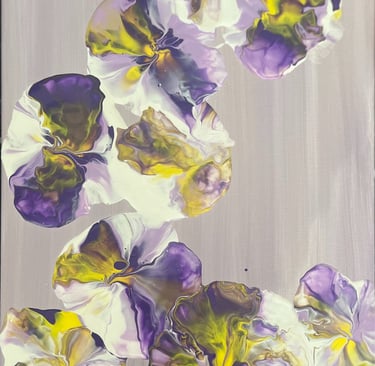
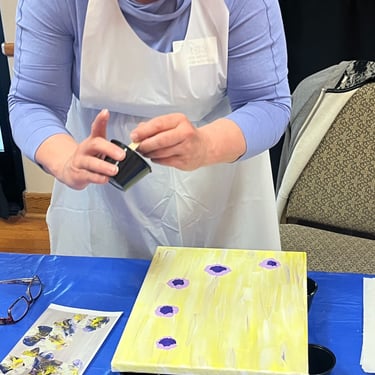
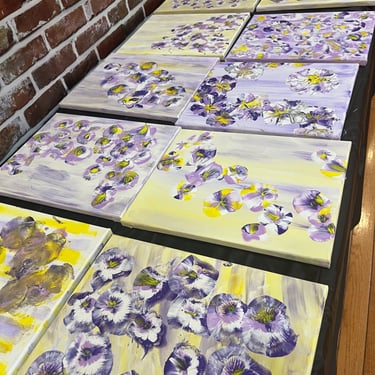
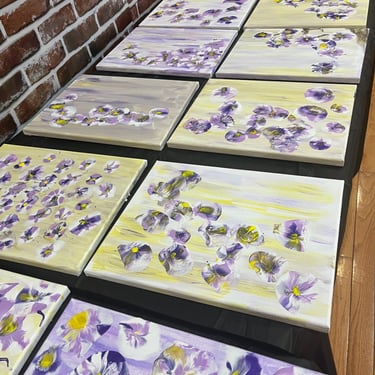
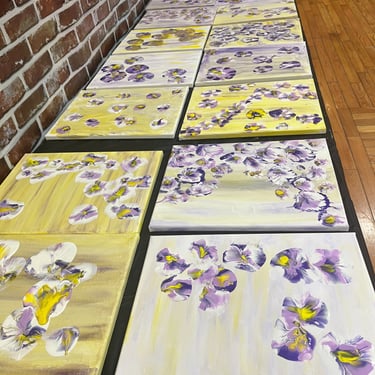
Now we'll use the fluid paints to begin laying in the puddles that will form the pansies. As you look at your canvas, think about how you would like the overall composition to look. I'm including a gallery of some layouts from a local class I taught to give you some ideas.
Start by using your stir stick to drop the dark purple in the pattern you chose. The overall puddle will be about 3" wide when you are done. So don't skimp here.
Next, go back and add light purple around the dark purple center. This will create your first ring around the center. After the light purple, then use your white as the final ring.
Finally, you'll place the yellow right in the center of your puddles.
Tip: Lay out how you think you want this to look. You can always add more in after you do the next step. Also, you can definitely do a light purple center then the dark purple. Or even create a few shades of purple rings. But, always end with the white and make sure the yellow is dropped in the middle.
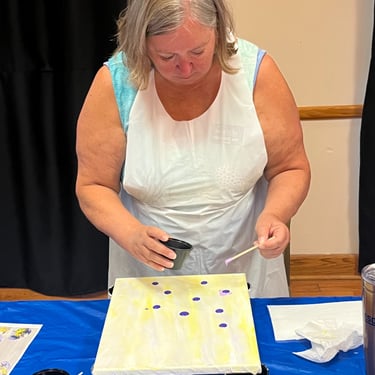
Step Three:
Now we have fun smashing the puddles. Take your glove and hold it like a balloon to blow air into it. While still blowing air into the glove, twist it to seal and hold the air in.
Next, you will begin pushing the main part of the glove over the puddles. This is light pressure, just pushing the paint. The hand part of the glove will create a beautiful pansy flower.
You can wipe on paper towels in between puddles or just keep moving on to the next one. It's important to do just one "pounce" per puddle. Trying to go over will completely change the look and just remove paint.
Tip: You can always add more paint and redo the puddle if you don't like the way it looks. You may have to blow up your glove several times during this process. Make sure to hold onto the fingers and thumbs of the glove so they don't get paint on them and mark up your canvas.
Once you are done with all your puddles, take a step back and look at your overall design. It's at this time you can add more puddles or redo any you are not happy with to create the look you want.
I'm including a video link to see this demonstrated.
Tip: A couple additional ideas you can do to add even more fun to this painting. First, you can grab green paint and after dry, paint in leaves and or stems. Second, grab a fan brush and put paint on it. Use your fingers to feather the brush and sprinkle droplets over the painting. You can do this in white, yellow, purple; using just one color, all of them or any combination. Let your imagination go!
Final Steps:
Let your painting completely dry. Depending on the amount of fluid paint you used and the climate, this could take 3-7 days. Once dry, you can use a gloss or semi-gloss varnish to brush over the entire canvas to seal and give a nice overall finish to your painting. I normally do 2-3 coats on my paintings, giving several hours in between to dry. I'll link the varnish I like. I find a very soft 3" brush or a sponge brush work great for varnishing.
And finally, share your paintings with me! I love to see your creations.
Happy Painting,
Aimee
Subscribe and get instant savings!
I invite you to immerse yourself in the stories that bring my original pieces to life. As a token of appreciation, I am delighted to offer you an exclusive instant savings code. Unlock the opportunity to own a piece of my artistic vision while enjoying a special discount.